Are you thinking about installing solar panels to save money and help the environment? Then you’re likely wondering what to expect from the solar panel installation process. This Solar Panel Installation Guide has been put together to run you through everything you need to know. In it, we’ll cover the sorts of things you should consider before the renovations start. After that, we’ll explain what the first few stages of the process look like, followed by the installation itself.
We should point out though that this article focuses more on the actual set-up of the panels themselves. It’s designed to be informative and technically focused, but perhaps you’re more interested in how to find installers or quotes. If that’s the case, check out our other solar panel guide.
Before you start a solar panel installation
If you’re considering installing solar panels, it helps to know what kinds exist and what they can do for you. Solar arrays have two main applications:
Solar panel electricity systems, also known as solar photovoltaic or solar PV for short.
Solar hot water systems, otherwise referred to as thermal systems.
Both types of solar panel installation are fitted to your roof through the same process. The only difference between them is in their effect on the household.
So, before you decide on a solar panel installation you first need to know what you want it to do. Do you want to supplement your home with extra electricity or hot water? Put another way, which source of bills do you want to reduce?
Solar PV
These solar panel installations are designed to save you as much money as they can on your electrical bill. When an installer visits your home to do some preliminary checks, they’ll figure out where the best place to install them will be. Ideally, they want to be somewhere high that’s going to be in the sun for as long as possible.
Depending on the size of your home, its location and your typical energy usage, you may even end up creating more electricity than you need.
In cases like this, there are programmes put in place to help you sell excess energy back to the National Grid for profit. If you want to know more, check out what the government says about the Smart Export Guarantee.
Solar panel installations that focus on solar PV are an excellent choice for those looking to make the most out of their investment.
Solar hot water
An ideal choice if you’re looking for something to support your existing boiler system.
Solar panel installations built for this will come in one of two types: flat plate or evacuated tube.
Flat plates are more visually similar to what you probably imagine solar panel installations to look like. Thin, flat boxes that are darkly coloured.
Evacuated tube systems consist of a series of glass tubes where, inside of each tube there’s a vacuum. This allows them to trap heat so that it can be sent through the house and to the boiler.
Talk to our MCS accredited solar installers if you’d like help deciding which one is best for you.
One thing to keep in mind though – this isn’t a replacement for your boiler. Solar thermal systems work by contributing additional heat to existing hot water tanks.
Preparations: home inspection
So, you’ve chosen what kind of solar panel installation you want for your home and we’ve given you a quote. Now comes the start of the project.
To begin with, we’ll send out an MCS accredited installer to do some inspections. In order to carry these out, you’ll have to be at home so that you can provide access and entry. Our installers may need to get to your back garden so that they can properly appraise where the solar panel installation will go.
The main purpose of this stage is to ensure that your home would benefit from solar panels. It’s not a common situation, but some homes aren’t ideally positioned to absorb enough sunlight for it to make sense.
This stage usually takes around 45 minutes. If everything is as expected then we’ll confirm the original quote; if not, then we’ll calculate a revised one. After that we’ll get all the details of the solar panel installation in front of you as soon as possible.
From here, you can then decide if you’d like to go ahead with the project.
Installation
There are multiple stages to the solar panel installation process. We’ll cover them one by one, detailing everything you need to know about what our specialists will be doing.
Scaffolding
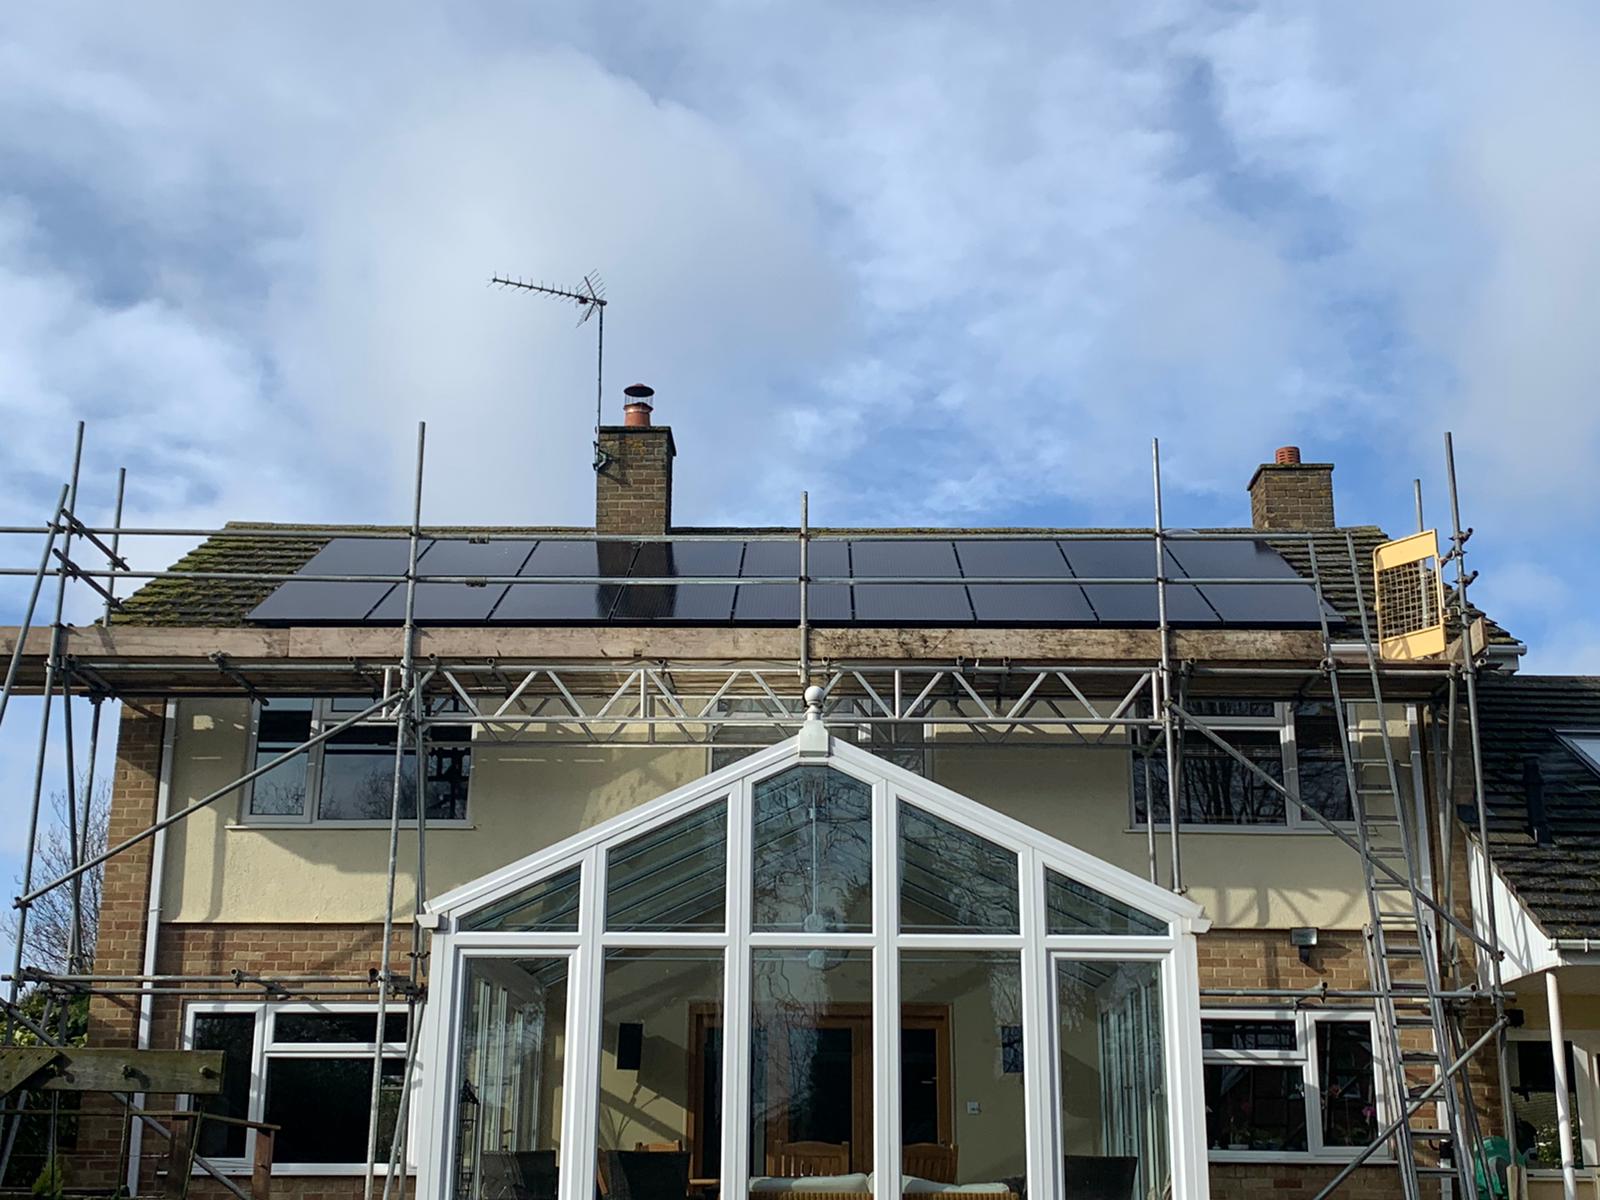
This requires a bit of preliminary installation. The rest of the work will take place over one day, however, we set up scaffolding two days prior. This allows us to ensure everything is as it was during the inspection.
It also lets us make sure the site is safe and we can take our time. If we were to rush this stage, then we could make mistakes and that could be dangerous for our installers. The two-day lead in period helps us avoid this.
Another benefit of hiring us for solar panel installation is that scaffolding costs are always included in our quotes.
Setting up the aluminium frame
Once the scaffolding is in place the true actual construction of the panels begins. First step is to attach bars of aluminium to the roof.
These form a kind of frame that the rest of the panels attach on to. We take a lot of care and attention at this stage to ensure every bar is parallel. If not, the solar panels will look poorly installed when they’re anchored on as they’d all be out of line.
Adding roof anchors
If the job of the frame is to make sure everything looks right, the job of roof anchors is to ensure everything fits right.
Using the measurements taken during the inspection, our installers will check where each panel will fit. Oftentimes our installers will use chalk to mark out where the individual parts of the installation will go. Importantly, this chalk will dissolve in the rain, so there’s no need to worry about any lasting damage.
Once the roof anchors are in place, the panels themselves can be added.
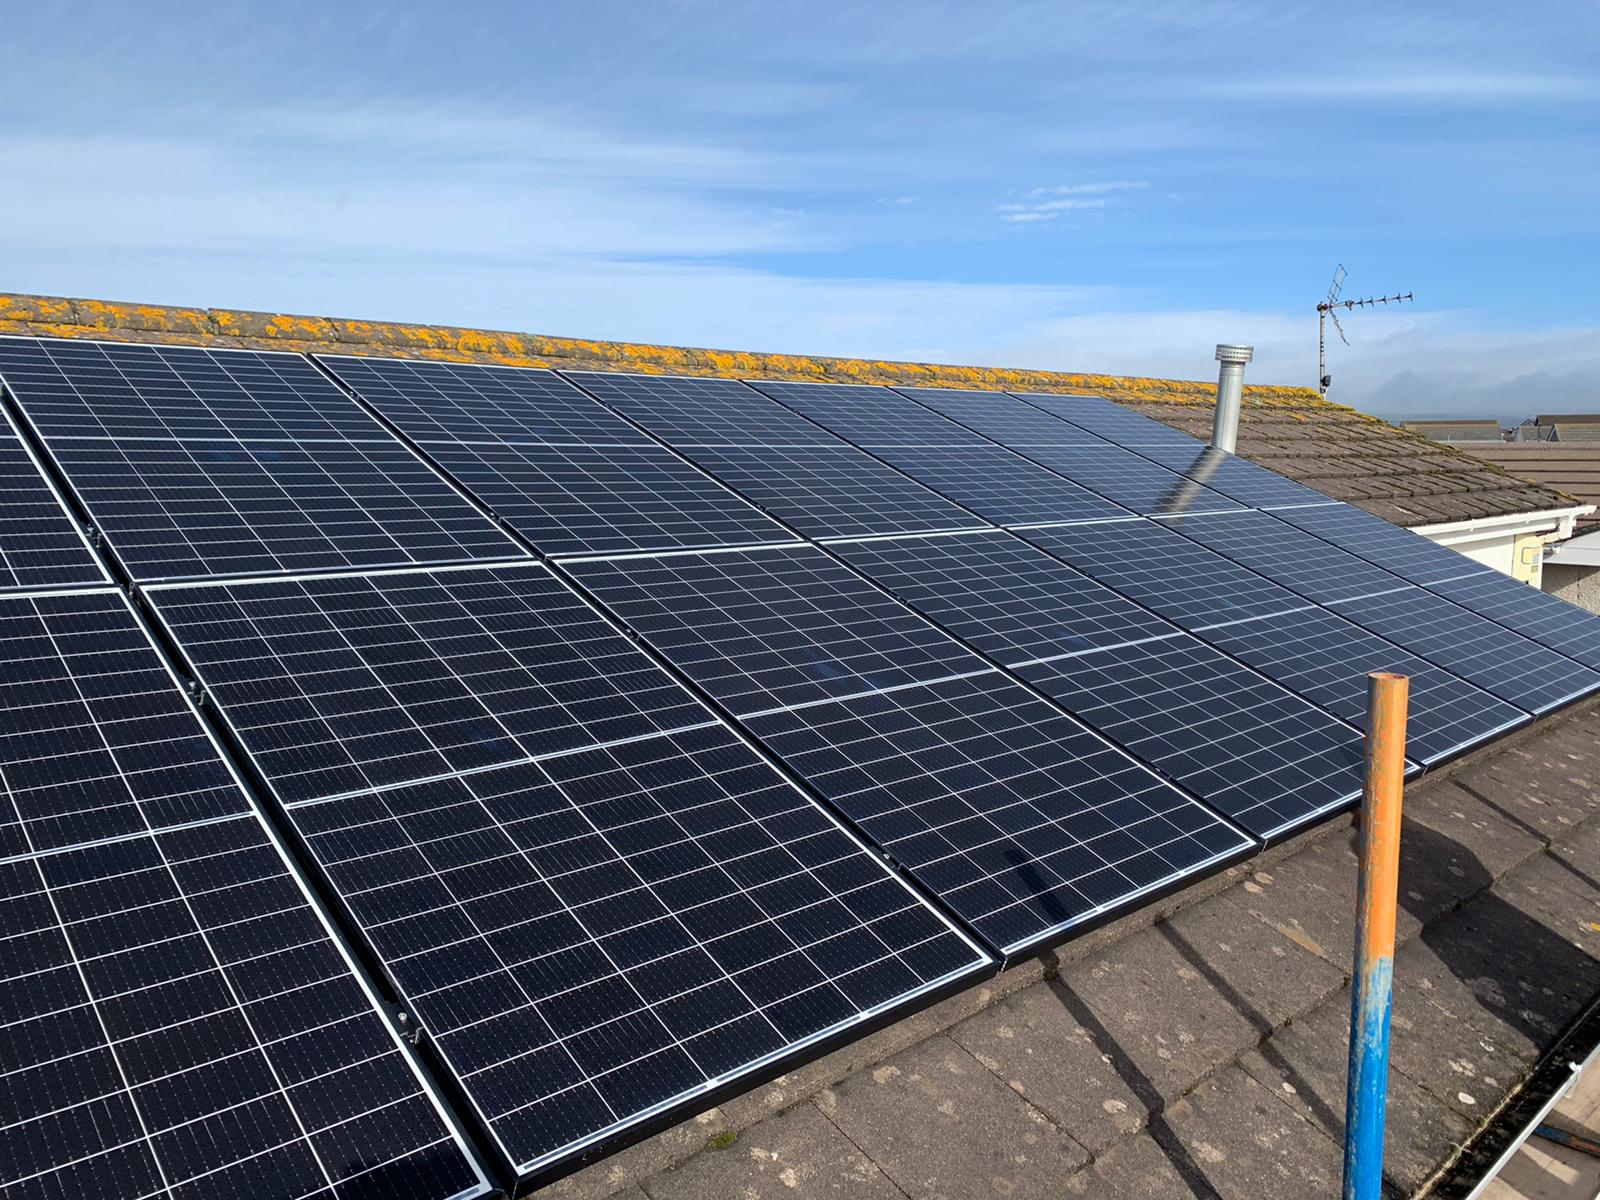
Installing solar panels
As you can see from the diagram, this is where the actual energy converting material are put in place.
It’s key during this process that we make sure the installation looks as good as it should function. We take a second after installing each panel to check that it appears straight when viewed next to the others. We do this from on top of the scaffolding, but we also have an installer on the ground to confirm. Most people will be seeing the solar panel installation from ground level, so its appearance from there is key.
The procedure itself is fairly straightforward. With the bars fitted earlier, we place the panels over them, binding them together with clamps. Some installers will do this row by row. Depending on what’s most appropriate though, our professionals may fit them column by column instead.
Running wiring throughout the house
Now that the hardware is installed, we can connect all the wires to wherever they need to go.
The internal wiring of the panels comes complete from our manufacturers. This just leaves us with the job of connecting them to each other as well as the household.
Factors that influence how this connection process goes includes:
- The position of the panels
- How much shading the roof experiences on average
- The voltage of the solar panel system
- The ampage and the power
To prevent the wires from touching the roof, we wrap them to the same frames the panels attach to. Furthermore, any wires that go into the home are typically run through the loft. This keeps any messy cables out of sight.
In some instances, this stage might be carried out earlier. It depends on how your house is laid out and the preferences of the installers. Before everything is screwed in place, it can be beneficial to pre-emptively run the wiring through the house. If things are locked in position and need to be moved then it ends up doubling the workload.
We also want to provide as timely as service as we can for you. So, the on-site installer will likely make a judgement call as to when it’s appropriate to conduct this stage.
Finishing touches
The final stage is a quality assurance check. Once the system is turned on by activating the inverter switch, we will collect some data. We take certain voltage measurements and compare them with what’s expected.
Assuming that all goes as planned, the last step is to grant the installation an MCS accreditation. Our ability to grant this is one of the many benefits of hiring our fully qualified team of specialists. All solar panel installations in the UK require this, or a similar certification. Without it, the installation violates the law.
Get a solar panel installation quote from Forever Green Energy
Feel comfortable in your knowledge of solar panel installations? If so, and you want to see just how much they could save you, fill out the form below. We’ll get back to you with a quote for a complete installation. Don’t miss out on reduced energy bills – contact us today!