Solar Panels Installation Guide
This guide explains a typical solar panels installation from start to finish, and what you should do before and after the installation.
Book a quote with a member of our expert team.
Certified Quality
Forever Green Energy is trusted and certified by industry leaders, including Octopus and Tesla and boasts 13 years service from offices in Gloucestershire and South Wales.


Find an installer
If you’re considering installing solar panels on your home It is very important that you find an MCS accredited installer to complete the process.
We are registered MCS Solar installers and providing you 100% reassurance and peace of mind for your solar panel installation.


Get A Quote
We highly recommend getting 3 quotes from MCS accredited solar panel installers, who will visit you to determine whether solar panels are right for you and your home.
With 3 quotes, you’ll get the best possible advice and price comparison for your solar installation, ensuring achieve the best possible service and solar install.
Home Assessment
If you’re considering installing solar panels on your home It is very important that you find an MCS accredited installer to complete the process.
We are registered MCS Solar installers and providing you 100% reassurance and peace of mind for your solar panel installation.

Setup
Scaffolding
The scaffolding will go up two days before the installation to make sure there is plenty of time to make everything safe for our installers.
Unlike many other installers, we always include the cost of the scaffold in our quote so you know exactly where you stand.
Attaching the Frame
Next the aluminium bars that make up the frame are then locked into the anchors and screwed into place. We’ll check each bar to make sure it’s straight, and that all the bars are parallel.
This is the most important step in making sure the panels will look correct.
Roof Anchors
We’ll check the measurements taken during your site survey and make small chalk marks on your roof to show where the panels will go.
The chalk will wash off next time it rains. The next step is to screw the roof anchors to the rafters.
Installation
Fitting Panels
With the bars in place, the next step is to clamp the panels to the frame. Depending on what’s easier, we may fit the panels by row or by column.
As well as taking measurements, we’ll check that the panels look straight – not just from where we’re sitting on the roof, but from down on the ground too.
Wiring
Panels are already wired by the manufacturer so connecting them is fairly straightforward. How we connect the panels depends on the system’s voltage, amperage and power, as well as the position of the panels and any shading on the roof.
The wires connecting the panels are then kept off the roof tiles by attaching the cables to the rails the panels are clamped to.


Completion
Inverter Setup
To get the finished system connected, we need to run the DC wiring from the panels into your home.
Our electricians always work hard to hide as much of the wiring as possible by routing the cable into the loft space under the panels.
Commissioning System
Once the wiring’s complete, your project manager will switch on the inverter and power up the system. They’ll send the voltage readings to the team at head office, where we’ll check them against the expected performance and confirm the system’s performing up to standard.
The final step is for us to apply for your MCS certificate.
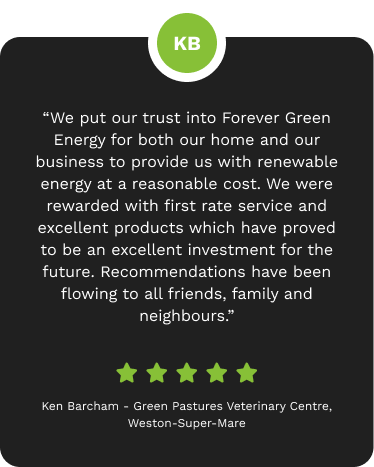
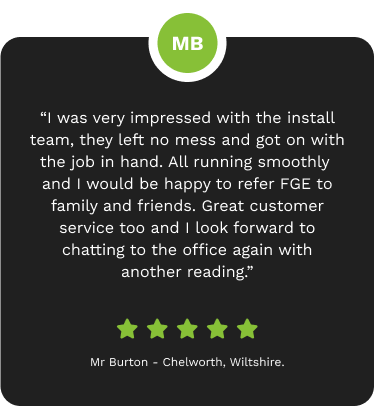
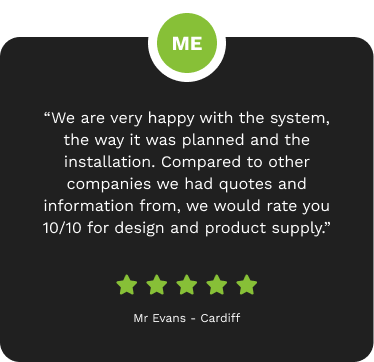
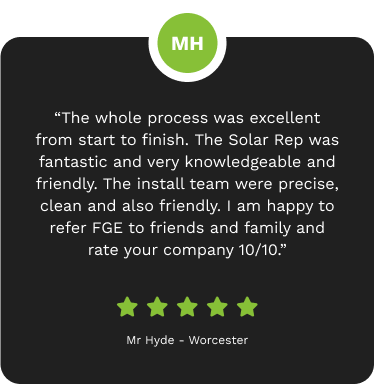
Here’s what our customers think….
To find out more about what our commercial and residential customers think, look at our customer reviews and case studies


Installation video
Ready to be fully energy Independent?

Reduce reliance on the grid and shield yourself from rising energy costs.

Harness all your solar power and store energy for when you need it most.

Shrink your carbon footprint and make a positive impact on the environment.
Take control of your energy future today and contact us today.